
Challah bread is a traditional Jewish loaf that is often enjoyed during Shabbat and other festive occasions. Its rich, slightly sweet flavor and soft, airy texture make it a favorite among many, whether or not they observe Jewish customs. This braided bread not only serves as a symbol of unity and love but also provides a delightful addition to any meal. In this article, you will learn about the history and significance of challah, discover an easy recipe for making a beautiful loaf at home, and gain tips for success, variations, and serving suggestions.
The Significance of Challah
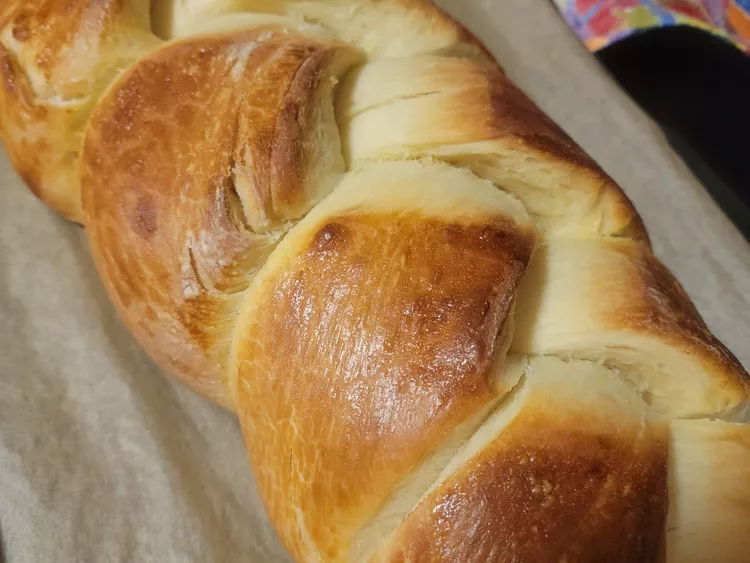
Challah has deep roots in Jewish culture and tradition. It is typically braided and made with eggs, which contributes to its golden color and rich flavor. The braiding symbolizes intertwining lives, representing family unity and continuity.
Rituals and Customs
- Shabbat Celebration: Challah is a central part of the Shabbat meal, representing the double portion of manna that the Israelites received in the desert.
- Ritual Blessing: It is customary to recite a blessing over the challah before breaking bread, a moment of gratitude and reflection.
- Holiday Usage: During festive occasions like Rosh Hashanah and Yom Kippur, challah may be shaped into round loaves to signify the cycle of the year.
Ingredients for Easy Challah Bread
To make your own delicious challah, you will need:
- 4 cups all-purpose flour (plus extra for kneading)
- 1 packet (2 1/4 teaspoons) active dry yeast
- 1/4 cup granulated sugar
- 1 teaspoon salt
- 1/4 cup vegetable oil or melted butter
- 4 large eggs
- 1 cup warm water (approximately 110°F/43°C)
- 1 egg (for egg wash)
Optional Ingredients
- Sesame or poppy seeds for topping
- Honey for additional sweetness
Easy Challah Bread Recipe
Step 1: Prepare the Yeast
- Activate the Yeast: In a small bowl, combine the warm water, sugar, and yeast. Stir gently and let it sit for about 5-10 minutes until it becomes frothy. This indicates that the yeast is active.
Step 2: Combine the Ingredients
- Create the Dough: In a large mixing bowl, combine the flour and salt. Make a well in the center and add the yeast mixture, oil (or melted butter), and three of the eggs (reserve one egg for the egg wash). Mix until the dough starts to come together.
Step 3: Knead the Dough
- Knead the Dough: Transfer the dough onto a lightly floured surface. Knead for about 10-12 minutes until the dough is smooth and elastic. If the dough is sticky, add a little extra flour as needed.
Step 4: First Rise
- Let the Dough Rise: Form the dough into a ball and place it in a lightly oiled bowl, turning it so the entire surface is coated. Cover the bowl with a clean kitchen towel or plastic wrap. Allow it to rise in a warm, draft-free location for about 1-2 hours, or until it doubles in size.
Step 5: Shape the Challah
- Prepare to Shape: After the dough has risen, punch it down to deflate it. Transfer it to a floured surface and divide it into three equal pieces for a traditional braid. For a larger loaf, you can divide it into six pieces for an even more intricate braid.
- Roll the Strands: Roll each piece into a long rope, about 12-15 inches in length.
- Braid the Challah: Lay the three strands next to each other on a baking sheet lined with parchment paper. Braid them together, starting from the center and working outward. Pinch the ends to seal them together.
Step 6: Second Rise
- Let It Rise Again: Cover the braided loaf with a towel and let it rise for another 30-60 minutes, allowing it to puff up.
Step 7: Preheat the Oven
- Preheat Your Oven: While the dough is rising for the second time, preheat your oven to 350°F (175°C).
Step 8: Egg Wash
- Prepare the Egg Wash: Beat the reserved egg in a small bowl. Once the dough has risen, gently brush the egg wash over the surface of the challah, giving it a beautiful golden color as it bakes. If desired, sprinkle sesame or poppy seeds on top for added texture and flavor.
Step 9: Bake
- Bake the Challah: Place the braided loaf in the preheated oven and bake for 25-30 minutes, or until the bread is golden brown and sounds hollow when tapped on the bottom. An internal temperature of 190°F (88°C) is ideal for fully baked bread.
Step 10: Cool and Serve
- Cool: Once baked, remove the challah from the oven and let it cool on a wire rack for at least 15 minutes before slicing. This helps the internal steam escape and prevents a doughy texture.
Tips for Success
- Measure Ingredients Accurately: For best results, use a kitchen scale to measure flour and other ingredients, or ensure you spoon the flour gently into the cup and level it off to avoid packing it down.
- Monitor Rising Times: Dough rising times may vary based on temperature and humidity. Look for signs of dough doubling in size rather than strictly timing the rises.
- Don’t Skip the Egg Wash: The egg wash gives the challah its glossy, golden appearance. It also adds a touch of flavor.
- Experiment with Flavors: Don’t hesitate to add ingredients such as raisins, cinnamon, or herbs to your dough for unique variations.
- Store Properly: After cooling, store leftover challah in a sealed bag at room temperature for up to 2-3 days. It can also be kept in the freezer (wrapped tightly in plastic) for up to 3 months.
Variations of Challah Bread
1.
Sweet Challah
: For a sweeter version, increase the sugar to 1/2 cup and add a teaspoon of cinnamon to the flour mixture.
2.
Savory Challah
: Add herbs like rosemary or thyme to the dough for a savory twist that pairs well with soups and salads.
3.
Raisin Challah
: Incorporate a cup of raisins or dried cranberries into the dough for a sweet and fruity flavor.
4.
Chocolate Challah
: Swirl in chocolate chips or chunks into the dough before braiding for a dessert-style challah.
5.
Whole Wheat Challah
: Substitute half of the all-purpose flour with whole wheat flour for a healthier option.
Serving Suggestions
Challah bread is incredibly versatile and can be enjoyed in various ways:
- Traditional Use: Serve it sliced alongside a meal, perfect for dipping in soups or enjoying with butter and jam.
- French Toast: Use leftover challah to make decadent French toast by soaking slices in an egg and milk mixture before pan-frying.
- Bread Pudding: Transform stale challah into a delicious bread pudding with cream, sugar, and spices, baked until golden.
- Sandwiches: Use slices for elevated sandwiches, pairing with deli meats, cheeses, and fresh vegetables.
- Holiday Celebrations: Serve challah on holidays and special occasions, celebrating its rich cultural significance.
Conclusion
Making easy challah bread at home can be a delightful and rewarding experience. This traditional Jewish loaf, with its soft, slightly sweet, and airy texture, brings people together and elevates any meal. Whether enjoyed during special occasions or as an everyday treat, homemade challah is sure to impress friends and family alike.
By following this guide, you can create your own beautiful loaf of challah that not only tastes wonderful but is steeped in cultural significance. Enjoy the process, and don’t hesitate to experiment with flavors and variations. Happy baking!
Recommended Products
As an Amazon Associate and member of other affiliate programs, I earn from qualifying purchases.